
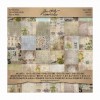
Hi everyone! Just in time for Compendium of Curiosities III Challenge #21! Our hostess for CC3C is non other than the fabulous Linda Ledbetter. This challenge is found on page 55 of Tim Holtz's Compendium of Curiosities Volume Three book. If you don't have this great book you can find it here and Tim Holtz will even sign it for you!!! This challenge is sponsored by Inspiration Emporium who have a wonderful $50 gift voucher to give away to one lucky winner. Also, the Curiosity Crew Pick wins a fabulous pack of goodies from Tim and Mario! Now, here is my take on this "Rock Candy Distress Glitter" challenge! I made a triptych out of the Arch Frame die.

I will list all the products that were used at the bottom of this post. To start with I die cut three pieces of distress watercolor cardstock and three pieces of chipboard with the arch frame die.

Now, I can't give away Tim's fabulous challenge techniques but I can't tell you lots of other things about my project!

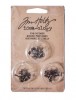
After all of my background pieces were completed with Tim's Challenge Techniques, I started distressing all my metal Idea-ology pieces. A little color combo I learned from Paula Cheney (Iced Spruce & Mushroom, I did add a little Pumice Stone) to distress my metals! Works like a charm ;)

The Star Fastener was painted with Picked Raspberry and then distressed with Mushroom alcohol ink.

I wanted to make my own insert for the heart charm. I had some leftover distress watercolor cardstock that had been colored. I cut out a piece of the charm sticker and used as a template. I can't wait to get my hands on all of Tim's new punches that coordinate with his Idea-ology charms. They are already on pre-order! ;)

I attached my three arches with idea-ology hinges, using them on the inside instead of the outside.


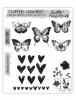
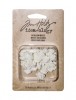
I cut out the butterfly, snipped it in half and attached the wings to her back.

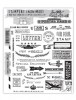
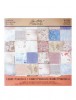
The tickets that were used on the first and third arch, were from Tim's new Correspondence paper. I cut a couple sprigs of vellum out of the spring greenery die with wallflower vellum and tacked it down with Passport Design Tape.


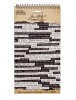
The phrases that I used were from Tim's new Small Talk Stickers. I distressed with a little antique linen and pumice stone ink and a blending tool. I cut the long strip into 3 separate pieces.

To give it a finished look I painted the three pieces of cut out chipboard with frayed burlap distress crackle paint and let dry. Then I gave it a wash of a walnut stain paint watered down and dried really well.

Gotta love that crackled goodness!

I attached all three pieces of chipboard to the back of the watercolor cardstock to give it a finished look.


Remember to enter your "Love is in the Air" themed projects over at Inspiration Journal and one lucky winner will be given a very generous $50 gift credit, to spend at Inspiration Emporium. You can find all the supplies I used at Inspiration Emporium via the links below. Remember to use my coupon code - vintagemuse - to save 10% on your order. I hope you enjoyed my Rock Candy Distress Glitter triptych! If you have any questions or if there's anything I missed please let me know I love your comments, I appreciate each and everyone of them! As always thanks for stopping by and I'll see you next time!


Super gorgeous creation, love this!! Thanks for sharing step by step, it is very informative. I pinned your creation on my Pinterest board :)
ReplyDeleteWhat a beautiful work of art... love the layers and all those little details and elements that make this so special... great use of the technique... Thanks for playing along with the CC3C x
ReplyDeleteHow beautiful is this!! Love every detail and thanks so much for the great tutorial, a joy to read. Excellent work with the glitter technique. I love how it combines with your black and white and grungy elements. Very artistic.
ReplyDeleteWow, Bobbi! This is truly a wort of art! I love absolutely every detail and everything about it! I, too, appreciate the wonderful tutorial and color suggestions. The glitter background turned out beautifully as well. Thanks for joining us for this challenge!
ReplyDeleteBobbi...your triptych is beautiful. I so love those background colors! Your little found relative girl is adorable as are all of the other little embellishments you've so painstakingly created for this piece. Love your Rock Candy Glitter technique on the backgrounds. Your crackled back sides of the triptych are lovely as well. Beautiful job and thanks for all of the photos and steps. I always look forward to your entries in CC3C. <3 Candy
ReplyDeleteSo, so very beautiful Bobbi! x
ReplyDeleteBeautiful! I love this!
ReplyDeleteSo adorable Bobbi !
ReplyDeleteThis is so lovely, love the colours, the textures, everything about it, beautifully thought out! x
ReplyDeleteIncredible! I absolutely love everything about this! All the little details are fantastic and the colours are beautiful. Thanks for sharing such a detailed tutorial. :)
ReplyDeleteAn absolutely stunning triptych - such glorious colours, and so beautifully embellished with such care and thought. Magical!
ReplyDeleteAlison x